Showing posts with label Baby. Show all posts

Nov 20, 2012

Ode to the Hand Turkey

The Hand Turkey was certainly among the original hand print arts.  This year, Punkin' and I decided to create a few original pieces based on our interpretation:


How to make cute whimsical Hand Turkeys | The Lowcountry Lady
All of our Hand Turkeys

We had everything we needed at the house:

  • A few pieces of paper (I like card stock and buy packs of it at Michaels or Hobby Lobby whenever they have a really good sale)
  • Craft paint - several colors
  • Small brush
  • Cute little hands

At 15 months, hand art is still fairly messy.  The biggest tip I have is to get everything setup before you start, including towels set aside to help clean and dry hands.  Not going to go into details about the steps other than to say start with hand prints and then and beaks, beards, eyes, and what not.  I also like to use a few different colors of card stock because I'm often surprised by which finished piece I like best.

Closeups...

How to make cute whimsical Hand Turkeys | The Lowcountry Lady

How to make cute whimsical Hand Turkeys | The Lowcountry Lady

How to make cute whimsical Hand Turkeys | The Lowcountry Lady

How to make cute whimsical Hand Turkeys | The Lowcountry Lady

I like to think these are a step up from most hand print art you see these days.  I think they'd make cute gifts (for grandparents or someone who really loves your kid, of course).

Sep 15, 2012

Hiding spot for Ellie?

All kids seem to love secret little hiding spots, don't they?  I remember spending all kinds of time putting together make-shift tents or forts when I was younger (I did grow up with two brothers which may have had something to do with it too).

Anyway, I recently saw an idea for a tent that can be thrown over a table on Pinterest and set out to create one for my little guy.


DIY homemade table tent for kids | The Lowcountry Lady


You could definitely use scrap fabric or even old or unused sheets to make one of your own. I didn't have enough so I picked some up from a local fabric store.


Steps to create your own:

1. Determine the length, width and height of your table.

2.  I recommend adding at least 3 inches to your measurements so you'll have enough to sew the seems. I also wanted the fabric to drape on to the floor a little so I added a bit more height to the sides, front & back.


DIY homemade table tent for kids | The Lowcountry Lady


3.  Choose any fabric you like. Since my fort is for a little boy, I kept that in mind when finding my fabric. I also wanted something that would hold up well and that could be washed.


4. I bought brown for the roof, brick red for the walls, and also a small amount of mesh-like fabric for the window. I did have some scrap at home that I decided to use for the trim and backing for the door


5.  Cut out each of your panels.


6. Sew the bottom (part closest to the floor) of your sides, front & back.


7. Determine the size and shape of your door. I opted to create a flap that could be tied open at the top. You could also create more of a slit type door and if you want to get fancy with that, also consider how the fabric on each side of the slit could be tied back. This might be a cuter route for a tent for girls.


8.  Cut the door.


9. If you want to finish the door with trim, you should do that now, otherwise just sew the edge to create a more finished tent.


10.  Sew fabric on the back of the door if you choose.


11. Sew on ribbon or strips of fabric to tie the door open.


12.  Determine the size and shape of windows and cut the fabric out. I did one simple rectangle but you could do squares and even add fabric trim or ribbon to make window panels.


13. If you choose to add mesh fabric to the windows, cut that to size. Sew trim and mesh on to complete the windows.


14.  Sew the front, sides & back panels to the top panel.


15.  Sew the corners shut and you're done!


My little one is fast asleep so I'll have to wait until tomorrow to see how he likes it. In the meantime, Ellie tested it out and loves it!


DIY homemade table tent for kids | The Lowcountry Lady

(updated) My little guy loves it too!


DIY homemade table tent for kids | The Lowcountry Lady

Aug 28, 2012

Dutch Door Baby Gates

Just wanted to share a few pictures of the dutch-door style baby gates we made to keep our little one safe from the stairs. I originally saw the idea in a cottage home magazine and more recently on Pinterest.


How to create a dutch door (half door) baby or dog gate | The Lowcountry Lady

How to create a dutch door (half door) baby or dog gate | The Lowcountry Lady

How to create a dutch door (half door) baby or dog gate | The Lowcountry Lady


How to create a dutch door (half door) baby or dog gate | The Lowcountry Lady

We installed one at the bottom of the stairs and one at the top. 

To build the gates, we followed these steps:
  1. Get a door. We bought a special order 5-panel door from Lowes that was composite filled. It was less than $75 and took about 10 days to arrive at the store for us to pick up. You could also reuse a door from the habitat restore or goodwill, if you're patient and find one that will work. Be sure the door is narrower than your opening.
  2. Cut the door. We made two cuts and elimated the center panel. Where you cut depends on the desired height of your gate and where any panels fall on your door. We marked the lines to cut with a yardstick and used a skillsaw to cut the door. 
  3. Paint the door. You could paint the door the same color as your trim or choose an accent color (which is what we chose to do). 
  4. Cut and paint door frame. We used extra wood from another project and painted it white to match other trim in our house. 
  5. Install the door frame. You'll want to make sure the side that the door is going to hang from is attached to a stud. 
  6. Attach the door to the frame with hinges. I recommend using two hinges per door and making sure they are sturdy enough to hold up if your little one decides the pull on (or eventually hang from) the door. 
  7. Cut, paint & attach trim to the top of the door. This will give the door a finished look. 
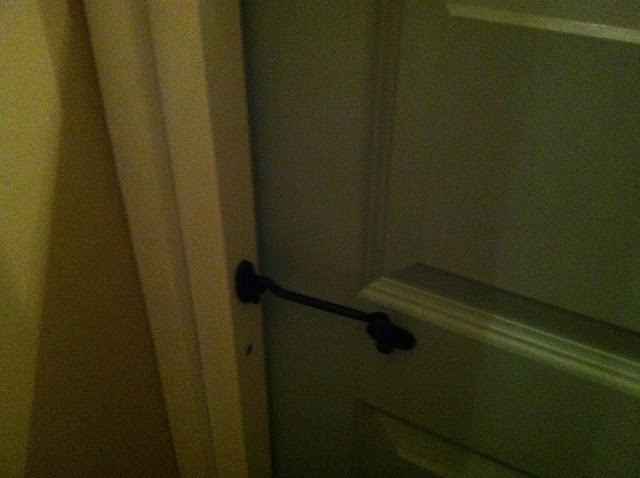
  8. Attach a latch. We used a cabin hook latch. We also chose to install ours about half way down the back of the door so the little one wouldn't have easy access if he reached over the other side.
How to create a dutch door (half door) baby or dog gate | The Lowcountry Lady

By the way, I wouldn't have thought of this if not for other creators.  One of my favorite places to find ideas is over at Savvy Southern Style.

1/29/17 Update:  See how the gate looks like against fresh SW Sea Salt monochromatic walls in my post The Old House.

Jul 28, 2012

Team USA!

Just because he couldn't stay awake for the opening ceremonies, doesn't mean my little guy isn't psyched about the Olympic games.  He woke up bright and early this morning so he could wear his homemade Olympic Games onesie.


Create your own olympics onsie or tshirt | The Lowcountry Lady

I created this myself using a onesie we already had and supplies from around the house.  To make one for your kiddo, here's what you'll need:


Supplies:


  • Onesie or t-shirt (white, grey, light blue or light pink would all make cute choices)
  • Fabric paint (blue, black, red, yellow and green)
  • A cap or lid (I used the top of a Snapple bottle) to make the circles
  • piece of thick paper or cardboard to put inside the shirt while you create your design
  • paper plate or something to put your paint on
Directions:
  1. Start with a clean onesie or shirt. If you want this to turn out perfect (I wasn't too concerned), then you might want to iron it to remove any wrinkles.
  2. Place a piece of cardboard or thick paper behind the fabric where you'll add your design.  This is so the paint doesn't bleed through to the back.
  3. Dispense a bit of the first color of paint onto a paper plate.  I recommend starting with black as that is the top center circle and will make it easier to keep your design centered.
  4. Coat the opening of a clean drink lid into the black paint.  Lightly blot onto a piece of paper towel to remove excess paint.
  5. Stamp the lid onto your shirt.
  6. Repeat steps 3 to 5 with your remaining colors.  Be sure to clean the lid in between each color.
  7. Let the design air dry or, if you're impatient like me, use a hair dryer for a couple minutes to set the design.
Ta-da!  You're little one is now ready for the games!